Tuesday, 8 December 2015

Auto Layout : Understanding Tricks of Trade Part - I


AUTO LAYOUT

Auto Layout is a constraint-based, descriptive user interface layout system for OS X and iOS.
The Auto Layout system defines layout constraints for user interface elements. Constraints represent relationships between user interface elements such as “these views line up head to tail,” or “this button should move with this split view subview.” When laying out the user interface, a constraint satisfaction system arranges the elements in a way that most closely meets the constraints. Constraints are objects and can be established in storyboards and XIBs, exposed as outlets, and created or modified in code.

This constraint-based approach to design allows you to build user interfaces that dynamically respond to both internal and external changes.

With this brief on auto layout, we will directly move to implementation of  auto layout on some screens that as an iOS developer we would have faced or will face some time or the other. Understanding of these will save time for us and will allow to make some flawless designs.

We will start with implementation of auto layout with scroll view, creating sections and will end with customizing those UIViews.


1.  Open your project where you want to implement auto layout or create a new one as you desire.
Add a New File  and make sure XIB is selected if Storyboard is not being used. I have added a file named TabsViewController with XIB.


2. Let's configure the View Controller. Go to the Attribute Inspector in the right pane and select the size you want to work with. 


3. We usually face problem working with Scroll View and auto layout. So let's start with resolving this challenge in a few easy steps. Add a Scroll View, select it and then click on Pin button.

4. Click on all four dotted lines, Top edge,Leading Edge(Left one),Trailing Edge (Right one) and the Bottom Edge and it will turn into solid lines. Make sure the check box against Constraint to Margins is Unselected. Then  click on Add 4 Constraints which shows that we have added 4 constraint. 


5. We will find that Blue lines on border of the scroll view appears which shows that scroll view has got its constraints perfectly fine. But before we start adding other elements on the screen we have to add another view on scroll view , missing of which may rise problems for us in future. 
So Add a UIView on Scroll View and again give the same constraints as you did for scroll view , Top Edge, Leading Edge, Trailing Edge and Bottom Edge. Make sure the check box against Constraint to Margins is Unselected.


6. Hey, why these red lines appear now???   Don't worry it just says that the view has not got all of its constraints that it needs. We will resolve this NOW !!

Select the UIView and click on the Align button just before the Pin button.  Then select Horizontal Center in Container and Vertical Center in Container check boxes.


7. Then click on Add 2 Constraints. And the magic happens to make us ready to start working with auto layout on scroll view.


Now, lets us see how to create sections in the screen and implement auto layout. This part will help to implement your understanding where the Screen is supposed to depict information or fields with different Data.

1. We will take three UIView and adjust them in a way that we want it the Screen to be divided. 


2. Select the first UIView and give it Top, Leading and Trailing constraints. Make sure you select the check box against Height and these will give proper constraints to the Top View. Make sure the check box against Constraint to Margins is Unselected. Click on Add 4 Constraints.


3. Select the Bottom view and give it Leading, Trailing and Bottom constraints. Make sure you select the check box against Height and these will give proper constraints to the Bottom View. Make sure the check box against Constraint to Margins is Unselected. Click on Add 4 Constraints.

 4.  Select the Middle View and give it all four constraints Top, Leading, Trailing and Bottom constraints.  Make sure the check box against Constraint to Margins is Unselected. Click on Add 4 Constraints.


5. We are all set to RUN the application and test if our auto layout is working fine. If you have implemented everything in the right way as mentioned then . . .

and, HURRAY!!! We perfectly completed  the first part of the tutorial . . 


We will continue our tour of Auto Layout to create two sections and then using those to 
customize our screen.

1. We will take two UIView this time of equal height and width.  We will select both the UIViews and select Equal Widths and Equal Heights from Pin Button. Make sure the check box against Constraint to Margins is Unselected. Click on Add 2 Constraints.


2. Don't worry for the orange lines appearing , they will disappear once we give all the constraints to the views. Select the Top View and give it all four constraints Top, Leading, Trailing and Bottom. then, click on Add 4 Constraints.  Then select the Bottom View and give all four constraints. Make sure the check box against Constraint to Margins is Unselected. Click on Add 4 Constraints


RUN the application and we will find the UIViews properly aligned. 


We will now see how to customize the content of these Views and likewise we can implement in the understanding from these in future projects. . .

1. we will take four views of same height and width and will align them in the bottom view. Select all the four UIViews and select Equal Heights and Equal Width from Pin button.Make sure the check box against Constraint to Margins is Unselected.  Click on Add 2 Constraints.


2. By now , I guess you are easily moving with the flow and understanding what are we doing and and what are we supposed to do next.

 Yes you are right, Select the UIViews individually and give all the four constraints Top, Leading, Trailing and Bottom. Make sure the check box against Constraint to Margins is Unselected. Click on Add 4 Constraints.


If you did everything the way as asked above, We are all set to see the magic of autolayout.
Build and RUN the application.


Press (Windows + Arrow Keys)  i.e. Rotate the Simulator and we will find that every view is properly set and aligned.


3. Similarly we can configure the content of top view the way we want. Lets add two UIView in the Top View of screen width and equal heights.


4. Select both the UIView and give Equal Widths and  Equal Heights from Pin Button. Make sure the check box against Constraint to Margins is Unselected. Click on Add 2 Constraints.


5. Like we did earlier , select the UIViews individually and give it all the four constraints.Make sure the check box against Constraint to Margins is Unselected. Click on Add 4 Constraints.


 Now Build and RUN the application and enjoy the hard work you did . . 
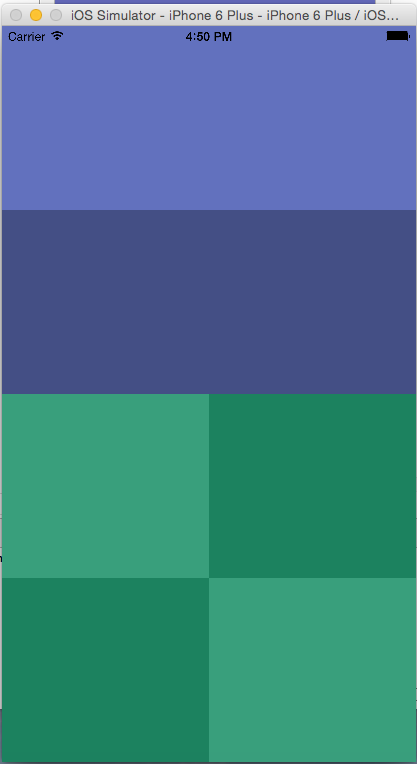


Rotate the simulator (Windows + Arrow Key) .


TAG: Auto Layout (Table View) :Understanding Tricks of Trade Part - II


Hope you will not find any difficulty implementing Auto Layout. 
Feel free to post your suggestions and your contribution to improving this tutorial will be highly appreciated . 
Thanks for visiting and do help your friends to save their time.

Saturday, 28 November 2015

How to Implement AFNetworking Library / without Cocoa Pods.

This is a guide to help developers get up to speed with AFNetworking. It is geared primarily towards anyone who is new to Mac or iOS development, or has not worked extensively with 3rd-party libraries before.
These step-by-step instructions are written for Xcode 5, using the iOS 7 SDK. If you are using a previous version of Xcode, you may want to update before starting.
Instead of boasting an killing your time over waste info, this tutorial will now direct you to implementation in simple easy steps. Enjoy saving your time to impress  your managers.
1. Download the AFNetworking Library from this Link:
https://github.com/AFNetworking/AFNetworking
2. Drag and Drop the entire folder "AFNetworking" in your project.

3. Then click on your project , then go to the build phases, selecting from the upper tabs, then press (CTRL+F) and then find the keyword "af" you will find a list of files from afnetworking. Some of the files do not support ARC so will need to add some flags .Don't worry i am still here to guide you even with this.
Double  click  on these files and then add then paste this string without quotes "-fno-objc-arc"
Files: 1. AFURLRequestSerialization.m
          2. AFNetworkReachabilityManager.m
          3. AFNetworkActivityIndicatorManager.m
          4. AFHTTPRequestOperation.m
          5. AFHTTPSessionManager.m
          6. AFHTTPRequestOperationManager.m
          7. AFSecurityPolicy.m
          8. AFURLResponseSerialization.m

4. Import this in your project's .pch file .
    #import "AFNetworking.h"
 Tag: http://icodesforcrazyclients.blogspot.in/2015/11/how-to-add-pch-file.html

5. Import Security Framework.

6.  This was all about background settings. But we have not yet covered how to use it as methods to operate on web services , i.e. to send the parameters to associated web services and response handling.
Below are the methods you just need to copy and use.

6.1 Create a class of NSObject and give it a name say "AFNetworkMethods"

6.2 Add these method declaration in its .h file:

6.3.1 POST METHOD
      +(void)callPostWSWithMethod:(NSString*)methodName withUrl:(NSString*)urlString withParameter:(NSDictionary*)parameter success:(void(^)(id response))successBlock errorBlock:(void(^)(NSError *error))errorBlock;

6.3.2 GET METHOD
+(void)callGetWSWithMethod:(NSString*)methodName withUrl:(NSString*)urlString withParameter:(NSDictionary*)parameter Block:(downloadBlock)block;

6.3.2 PUT METHOD
+(void)callPutWSWithMethod:(NSString*)methodName withUrl:(NSString*)urlString withParameter:(NSDictionary*)parameter success:(void(^)(id response))successBlock errorBlock:(void(^)(NSError *error))errorBlock;
and add this statement after the header file of .h file:
typedef void(^downloadBlock)(id success,NSError *error);

6.3 Now we will define the methods in its .m file:
First import app delegate in .m file: 
#import "AppDelegate.h"

6.4 
6.4.1 POST METHOD
     +(void)callPostWSWithMethod:(NSString*)methodName withUrl:(NSString*)urlString withParameter:(NSDictionary*)parameter success:(void(^)(id response))successBlock errorBlock:(void(^)(NSError *error))errorBlock
{
    AFHTTPRequestOperationManager *manager = [AFHTTPRequestOperationManager manager];
    manager.responseSerializer = [AFHTTPResponseSerializer serializer];
    [manager POST:urlString parameters:parameter success:^(AFHTTPRequestOperation *operation, id responseObject)
     {
         NSError *error;
         id result = [NSJSONSerialization JSONObjectWithData: responseObject options: NSJSONReadingMutableContainers error:&error];
         successBlock(result);
     }
          failure:^(AFHTTPRequestOperation *operation, NSError *error)
     {
         //NSLog(@"%@",[error description]);
         errorBlock(error);
     }];
}

6.4.2  GET METHOD
+(void)callGetWSWithMethod:(NSString*)methodName withUrl:(NSString*)urlString withParameter:(NSDictionary*)parameter Block:(downloadBlock)block;
{
    AFHTTPRequestOperationManager *manager = [AFHTTPRequestOperationManager manager];
    manager.responseSerializer = [AFJSONResponseSerializer serializer];
    manager.responseSerializer.acceptableContentTypes=[NSSet setWithObject:@"text/html"];
    NSString *token=[[NSUserDefaults standardUserDefaults] objectForKey:@"TOKEN"];
    NSString *str=[NSString stringWithFormat:@"Token %@",token];
    [manager.requestSerializer setValue:str forHTTPHeaderField:@"Authorization"];
    AFJSONResponseSerializer *jsonReponseSerializer = [AFJSONResponseSerializer serializer];
    jsonReponseSerializer.acceptableContentTypes = nil;
    manager.responseSerializer = jsonReponseSerializer;
    [manager GET:urlString parameters:parameter success:^(AFHTTPRequestOperation *operation, id responseObject)
     {
         block(responseObject,nil);
     }failure:^(AFHTTPRequestOperation *operation, NSError *error)
     {
         block(nil,error);
     }];
}

6.4.3 PUT METHOD
+(void)callPutWSWithMethod:(NSString*)methodName withUrl:(NSString*)urlString withParameter:(NSDictionary*)parameter success:(void(^)(id response))successBlock errorBlock:(void(^)(NSError *error))errorBlock
{
    AFHTTPRequestOperationManager *manager = [AFHTTPRequestOperationManager manager];
    manager.responseSerializer=[AFHTTPResponseSerializer serializer];
    NSString *token=[[NSUserDefaults standardUserDefaults] objectForKey:@"TOKEN"];
    NSString *str=[NSString stringWithFormat:@"Token %@",token];
    
    [manager.requestSerializer setValue:str forHTTPHeaderField:@"Authorization"];
    
    [manager PUT:urlString parameters:parameter success:^(AFHTTPRequestOperation *operation, id responseObject)
     {
         NSError *error;
         id result = [NSJSONSerialization JSONObjectWithData: responseObject options: NSJSONReadingMutableContainers error:&error];
         successBlock(result);
     }
         failure:^(AFHTTPRequestOperation *operation, NSError *error)
     {
         errorBlock(error);
     }];
}

7. Now we are all set to use these methods. lets see how to implement these methods. One thing that we need to know before implementing the last stage is that AFNetworking runs on a different thread,So you may find difficulty in handling them. But i know Visitors are smart enough to handle them. But why to waste time ,lets fasten the process of development and just copy and paste even this where you want to call the web service.
7.1 METHOD ILLUSTRATION
-(void) YourMethodName
{

    NSMutableDictionary *parameters = [[NSMutableDictionary alloc] init];
// add parameters to the dictionary.

    [AFNetworkHelper callPostWSWithMethod:@"" withUrl:
@"your web service url " withParameter:parameters success:^(id response)
     {
         if((response == nil) || (response == NULL))
         {
              return;
         }
         if(response)
         {
            // Handle the response.
         }
         else
         {
             return;
         }
     }
      errorBlock:^(NSError *error)
     {
       NSLog(@"%@",error);
     }];

}

Hope you will not find any difficulty implementing AFNetworking. 
Feel free to post your suggestions and your contribution to improving this tutorial will be highly appreciated . 
Thanks for visiting and do help your friends to save their time.

How to add a .pch file ?

How to add a .pch file??

This tutorial makes this task veru easy .
Lets have a brief look on what is it and what is it used for??

Prefix.pch is a precompiled header. Precompiled headers were invented to make compiling faster. Rather than parsing the same header files over and over, these files get parsed once, ahead of time.
In Xcode, you add imports of the header files you want in a “prefix header,” and enabling Precompile Prefix Header so they get precompiled. But the idea behind a prefix header is different from precompiling.
We need to follow these simple steps :
1. Right Click on Supporting files and select New File from pop up menu.


2. Then select Other option from IOS

3. We find pch file from there , select and then click Next.

4. Make sure the location of the .pch file is the project location. Click Create.


5. You will find the .pch file in your project. Start importing frameworks and files you want to be precompiled.


5.  If you find any error while building and running the app comment the lines as shown in below image and then add files as shown below.


Hope you will not find any difficulty implementing AFNetworking. 
Feel free to post your suggestions and your contribution to improving this tutorial will be highly appreciated . 
Thanks for visiting and do help your friends to save their time.