Learning Auto Layout With Table View
Getting your constraints right is definitely the hardest and most important part of getting dynamic cell heights and widths working with Auto Layout. If you make a mistake here, it could prevent everything else from working -- so take your time!
This tutorial will guide you to proper implementation of auto layout on table view and its custom cells. So lets start by making a class for our tutorial.
1. Create a New File and name it as you like (say AutoLayoutTableViewController) and do select the checkbox against XIB.
2. Drag and drop the TableView from object library and connect its DataSource and Delegate to the File's Owner.
3. We can alter the dimensions and selection style of the Table View. Do it if u want to and skipping this will not affect our basic implementation of auto layout.
Select the Table View.
4. Lets create the outlet of the table view.
5. Now we need to give constraints to the table view . We need to understand that we have to give constraints to the any object in such a way that it could automatically adjusts with the changing devices. So we need to properly specify the top edge, leading edge, trailing edge and bottom edge, nevertheless we need to specify the center alignments and some other constraints at times.
Here, for the table view we need to give the Top Edge, Leading Edge, Trailing Edge and Bottom Edge.
Select the Table view and click on the Pin button, located at the bottom of the screen. We will see this kind of pop up.
6. Click on all the four dotted lines surrounding the square box representing the object to make it solid color representing the selected constraint for the selected object. Make it sure the checbox against Constraint to margins remains unselected. After adding the constraints the pop up should look like this.
7. We find a button is enabled representing the number of constraints selected. Click on that button to give constraints to the object (Table View).
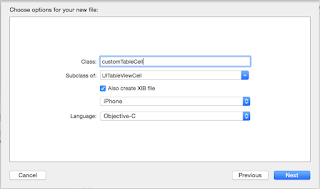
8. We see that the Table View is surrounded by blue color lines representing that the constraints are properly set. Now we are ready to implement the custom cells on the Table View. Lets start by creating a custom cell of king TableViewCell. Make sure XIB is selected.
9.Adjust the height of Table View Cell as you want to, here we will take it as 60. Do enter the same value of height in the Row Height Column.
10. Now drag and drop a Label from the Object Library in the Cell align as you like.
11. In the same way drag and drop two Image Views in the Cell. Let the cell look like this.
12. Select the rightmost Image View and click on the Pin button. For this we need to give Top edge, Trailing edge,Height and Width.
13. Select the Image next to the rightmost Image View and give the same constraints as you did for the rightmost image. This will fix the Height and Width and Top edge and trailing edge will be fixed with respect to the rightmost image. So whatever be the cell Width and Right most image and the next to it will look the same as we see here.
14. Select the Label. We need to give the constraints as such that the label's height is fixed along with the top edge leading and trailing edge and the width is variable, that is , the width should get adjusted as per the width of the cell.
15. Do add the Data Source and Delegate Methods of the table view and We are ready to kill the RUN button.
16. Now what if we want to alter the height of the label or any of the image view?? Do we need to remove all the constraints and add it from scratch ??? Is our time and labor got wasted
???
The answer to all these questions is tactfully answered by Apple. So lets see how....
Lets alter the Height of the first Image View and see what happens.
And we find that orange lines start appearing and suggesting that we need to fix this ambiguity of Auto Layout. Don't worry its not a troublesome task to do .
17. Click on the button next to Pin button "Resolve Auto Layout Issues" and click on the Update Constraints button while selecting the disturbed Image View and the magic happens.
Orange lines disappear again and blue lines showing us GREEN to move ahead comes along. So now lets RUN the application and see if we did learn the implementation of Auto Layout on Table View and on its Custom Cell.
Hope you will not find any difficulty implementing Auto Layout.
Feel free to post your suggestions and your contribution to improving this tutorial will be highly appreciated .
Thanks for visiting and do help your friends to save their time.


No comments:
Post a Comment